Launching eLxr for AWS x86 from the AWS Marketplace
About This Task
The Amazon Web Services (AWS) Marketplace offers the eLxr for AWS x86 image for use in AWS free of charge. Use this procedure to:
Access the AWS Marketplace on the web or through the dashboard
Locate and subscribe to the eLxr product
Launch eLxr in an EC2 instance (virtual cloud server) and connect to it.
Before You Begin
You must have an AWS Marketplace account and be logged in to it.
Procedure
Locate the eLxr Server 26.04 - Bianca - Free image.
On the Marketplace website, search for elxr at the top of the page.
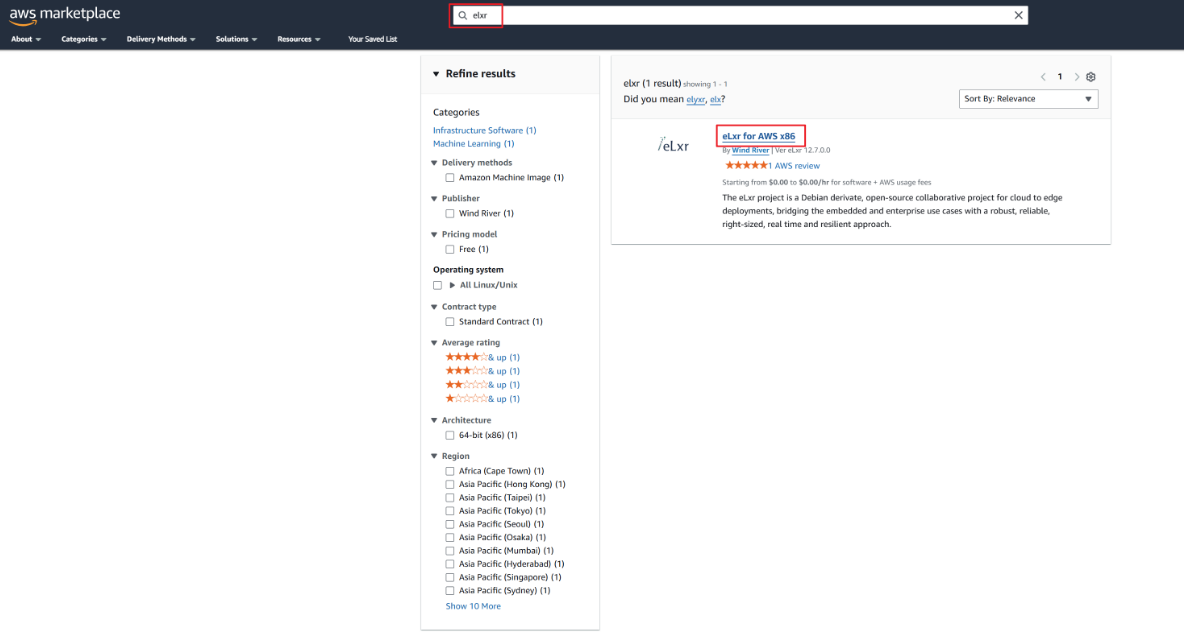
In the results, click eLxr Server 26.04 - Bianca - Free.
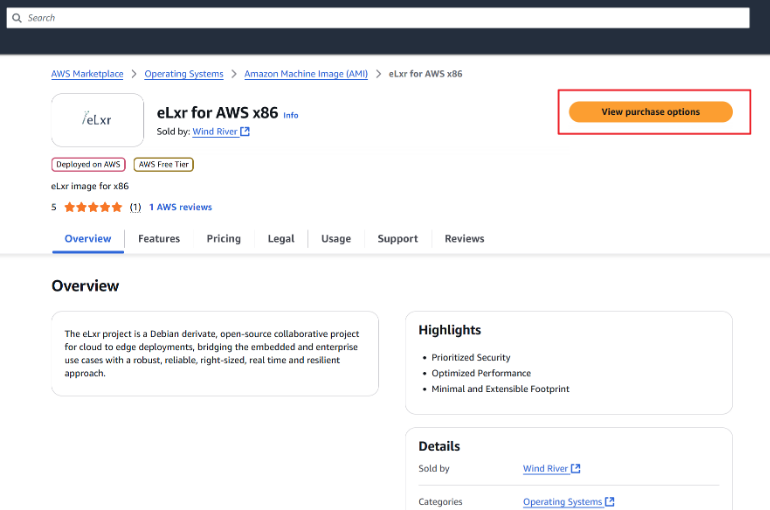
Subscribe to the eLxr product.
Click View purchase options
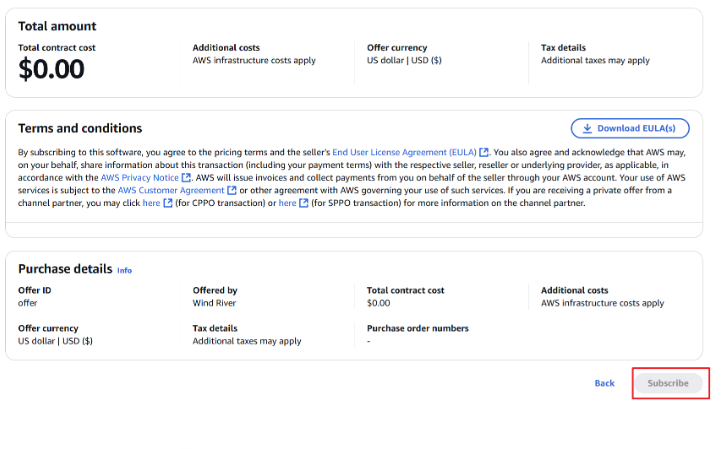
Scroll down and click Subscribe.
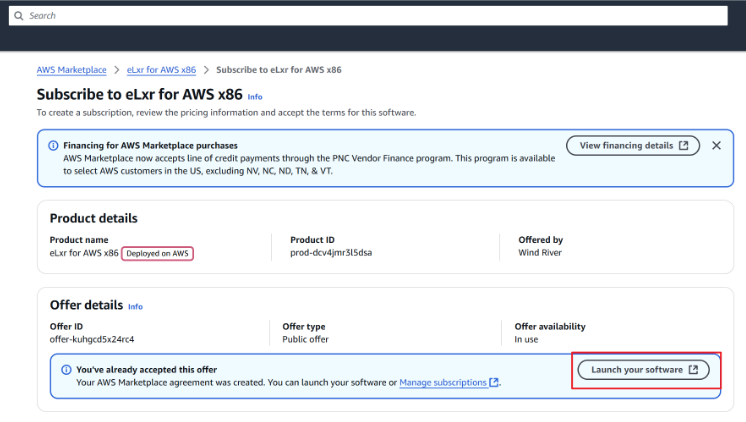
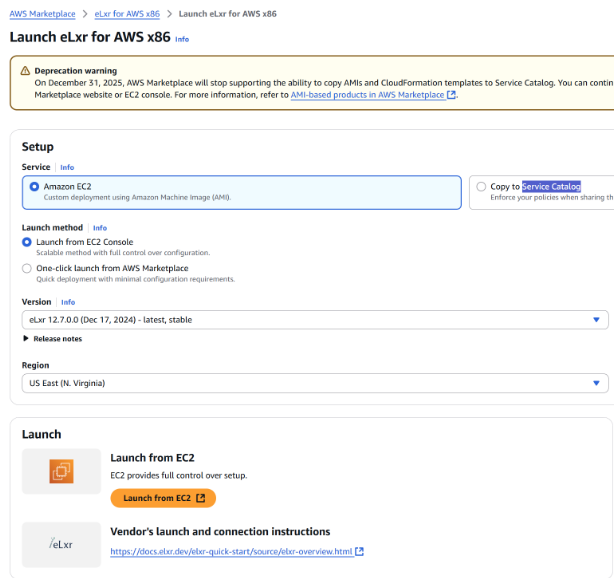
Open the AWS Marketplace Launch eLxr for AWS x86 page.
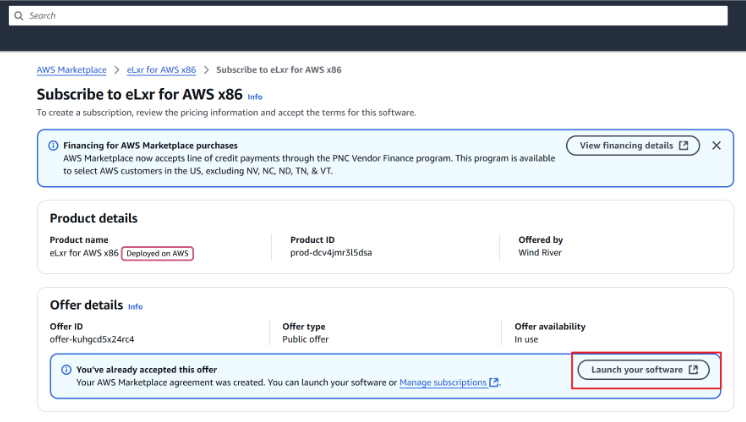
Option 1: From subscription in previous step
Click Launch your software. There are two options for the initial subscription; either one will work.
Option 2: From the AWS Marketplace > Manage Subscriptions page.
Locate your subscription and click Launch.
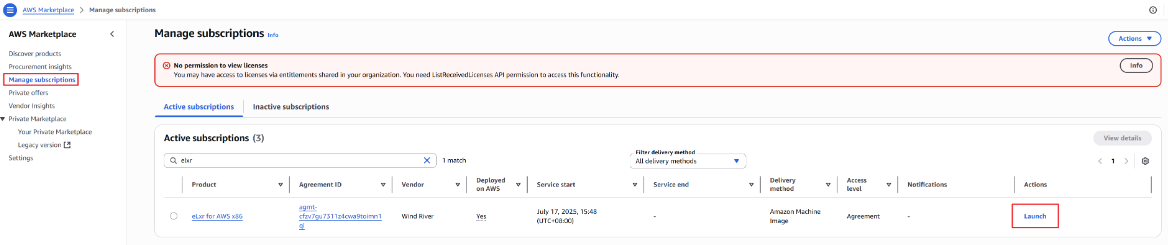
Both launch options open the Launch eLxr for AWS x86 page where you can choose your image deployment method.
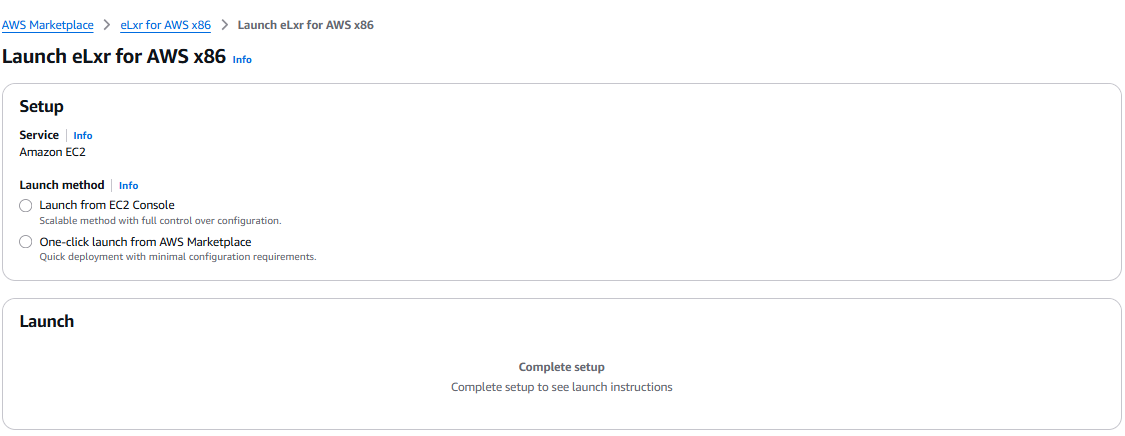
Launch your subscription using the following options:
Option 1: Launch from the EC2 Console (Recommended)
For details, see AWS documentation Connect to your EC2 instance
Select Launch from EC2 Console then click Launch from EC2.
Optionally enter an instance name, then click Launch.
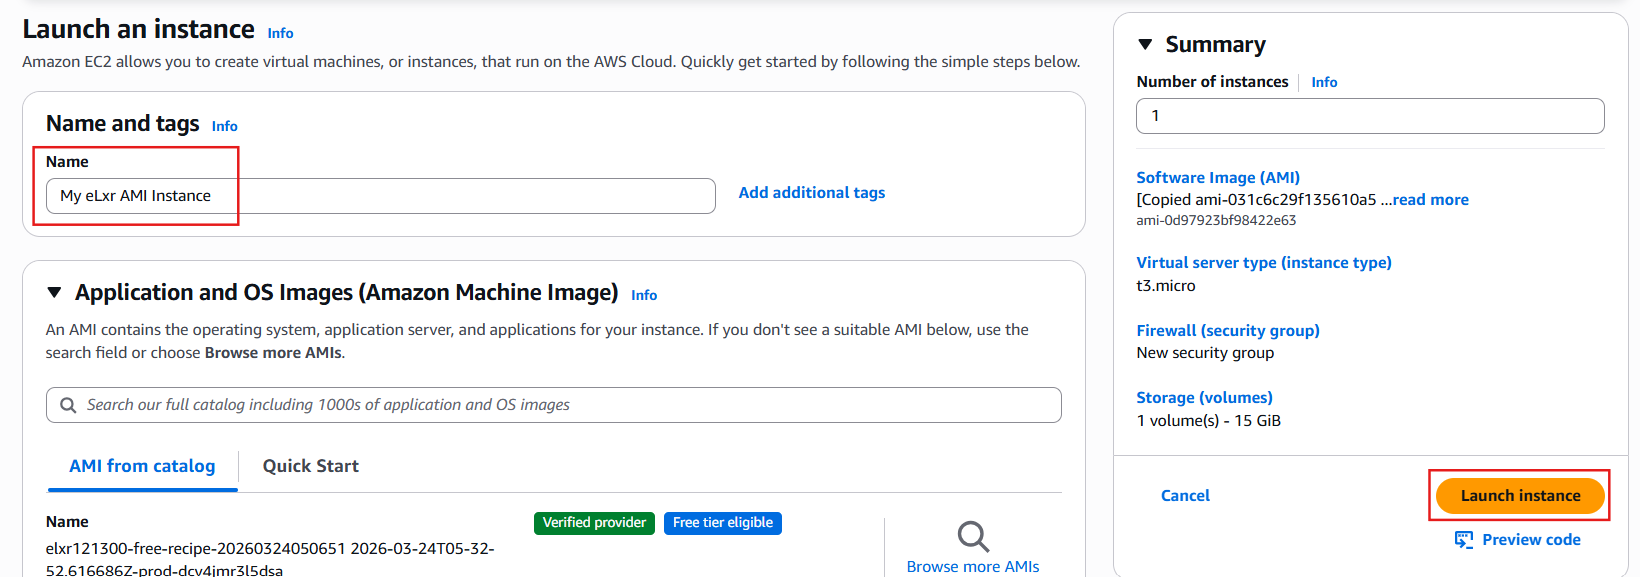
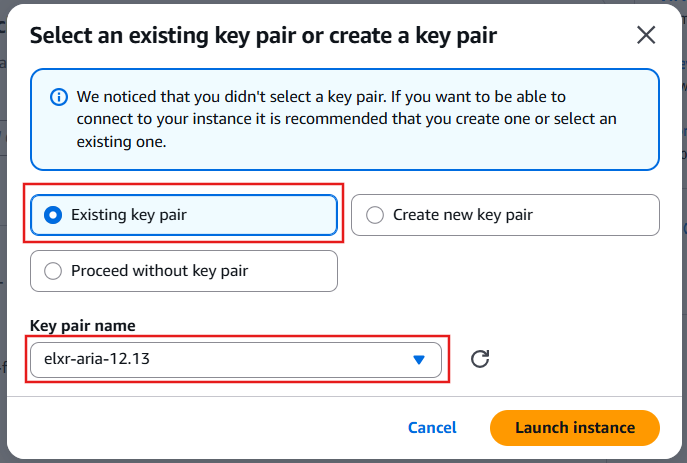
On your first launch, you will be asked to select or create a key pair to continue. You will also need to select an instance type, for example t3.small, and optionally create or select a security group. For additional information, click Info next to the item in the AWS interface or refer to the AWS documentation.
Select the option to create a key pair. Once complete, select the new key pair name, then click Launch Instance to continue.
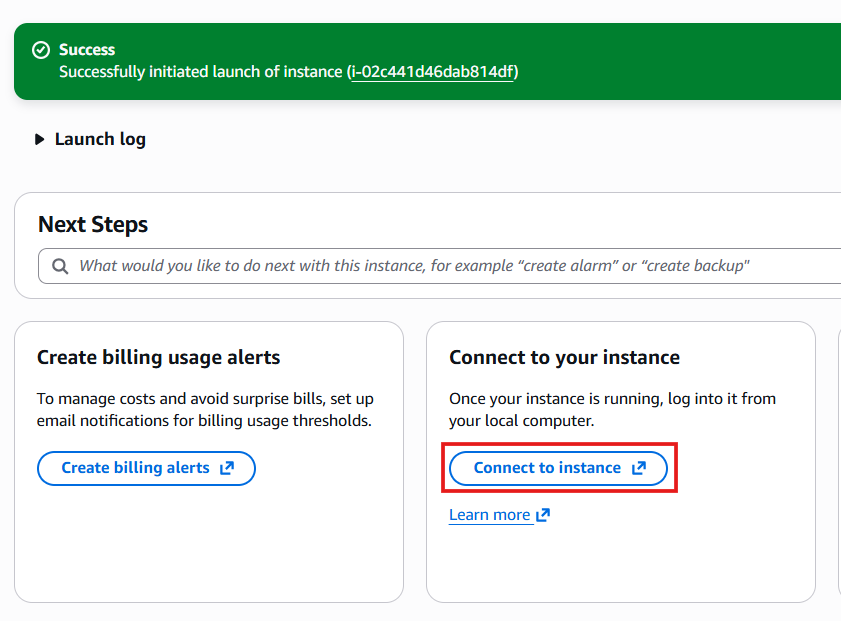
A page opens to display the successful launch. Click Connect to instance to continue.
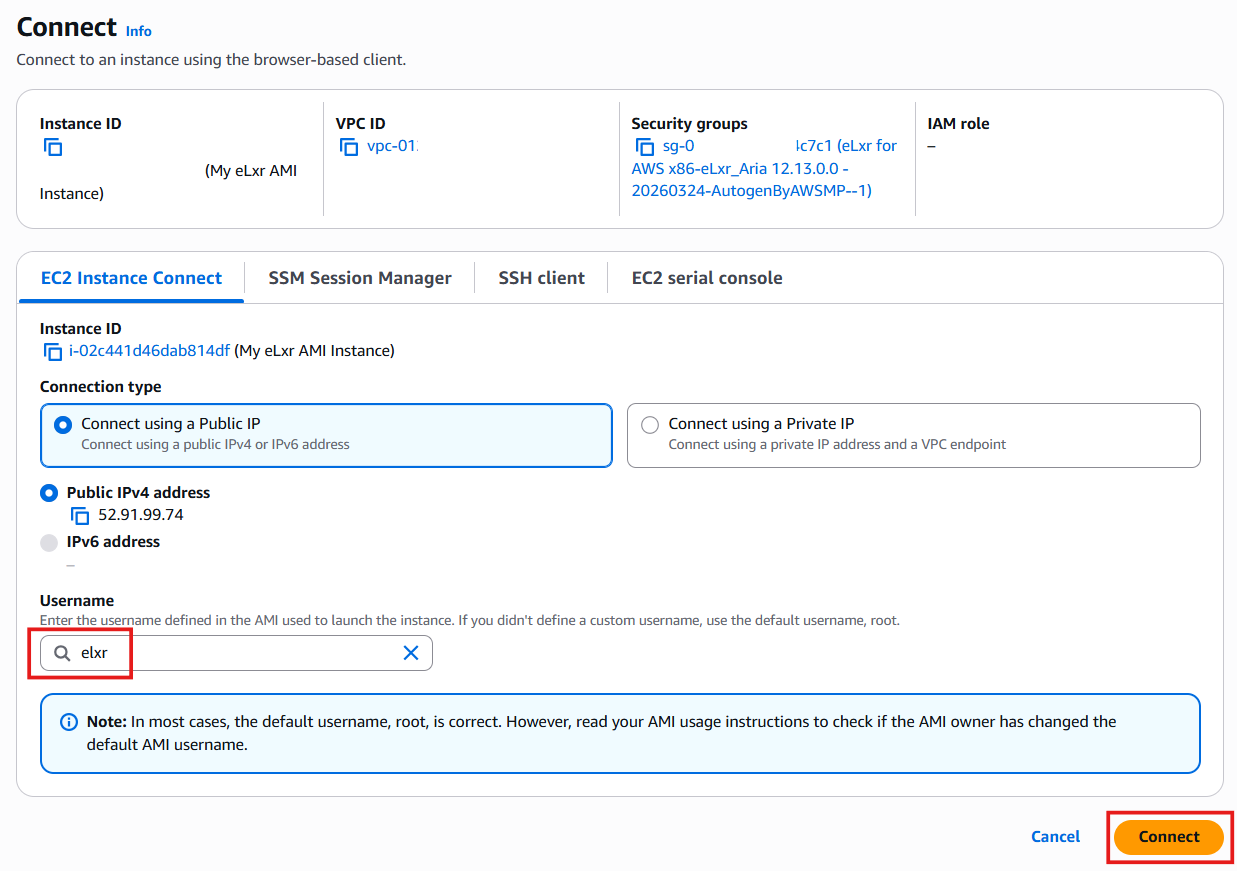
In the Connect page, enter elxr for the username, then click Connect.
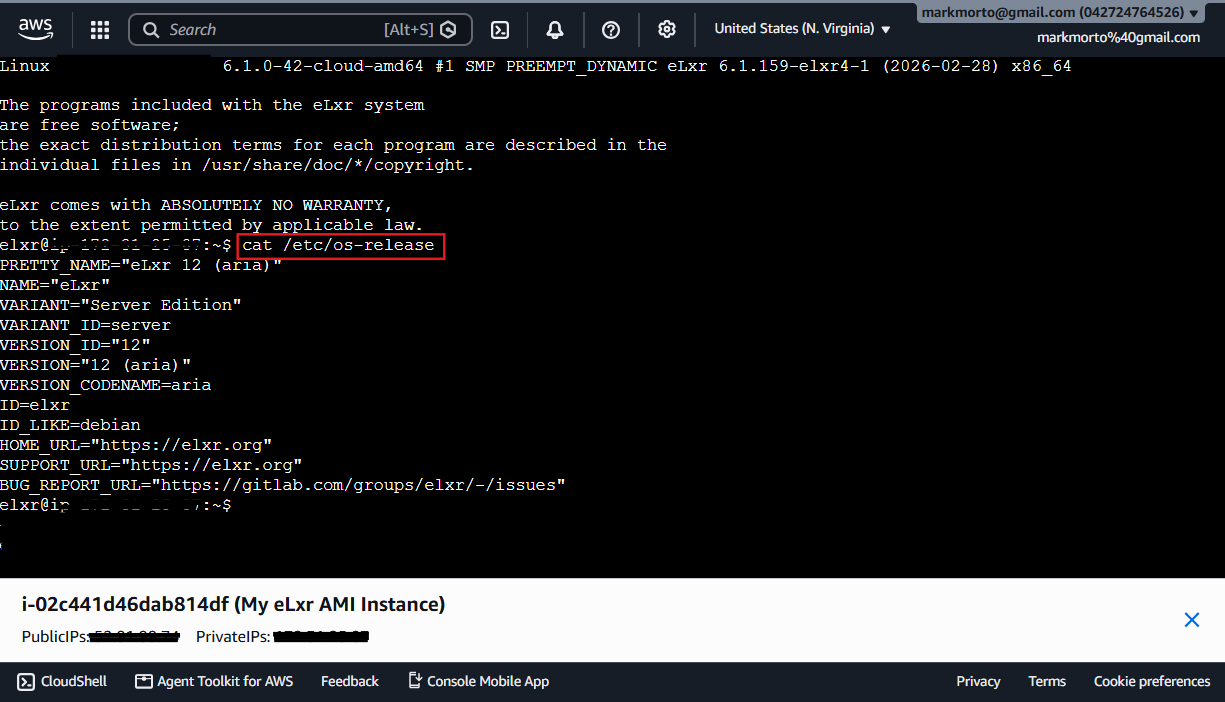
The eLxr instance console displays to provide command-line access to your instance. Enter cat /etc/os-release and press Return to obtain additional information about the release.
Option 2: One click launch from the AWS Marketplace
Use this option to launch your instance directly in a browser. You must select a security group and create a key pair to continue.
Similar to the EC2 launch, the eLxr instance console will display to provide command-line access to your instance.
Note
After the initial launch, use the EC2 Manage Subscriptions page and console to perform additional actions, such as launching or connecting to your instance.